WebMaker can be used online without installation. It is located at https://webmaker.hyfinity.com.
The WebMaker Studio can also be installed on local single user or multi-user environments. The Studio works on modern browsers including Google Chrome, Microsoft Edge, Apple Safari and Mozilla Firefox.
The WebMaker installer uses Java and requires Administrator credentials to complete installation. If you receive a User Access Control prompt, you should answer Yes
to the questions, to enable Java to execute.
You may also receive messages about untrusted source etc, and may need to trust the downloaded file or WebMaker/Hyfinity using the instructions based on your OS environment.
You should be able to run the installer by double clicking the downloaded file. If you have issues with this however, you can try launching the installer by running the following command from a console prompt: java -jar WebMaker_10.5.jar
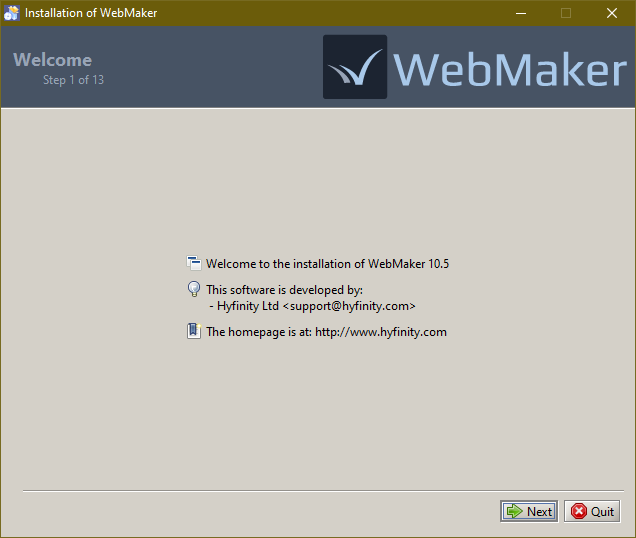
The first screen contains some welcome information. You can simply click Next.
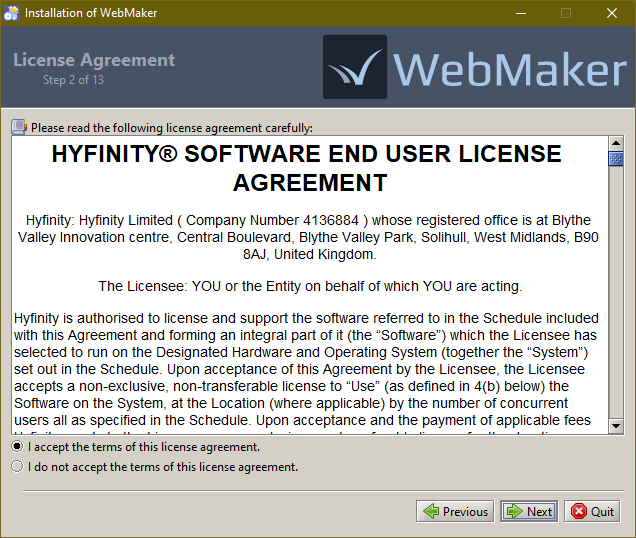
 You should see the License information in the next step. You need to accept the terms to proceed further.
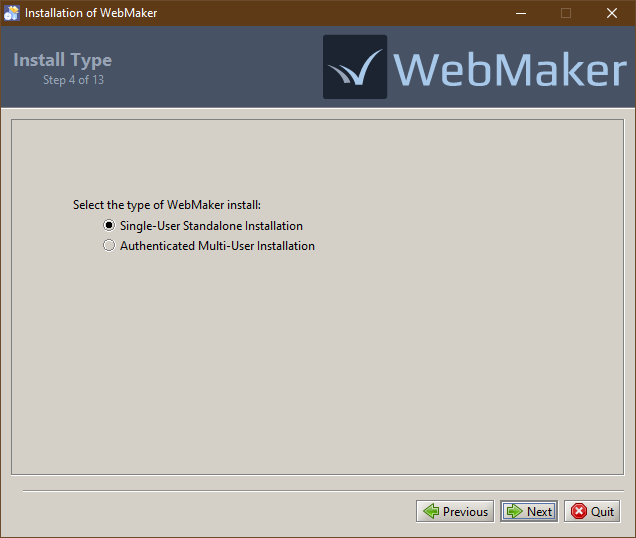
 The next step enables you to perform a
 Single-User Standalone
or Authenticated Multi-User
Install. If you are installing WebMaker on your own machine you should select the Single-User option. The Multi-User option should be used if you are installing WebMaker on a server environment that will be accessed by multiple users.
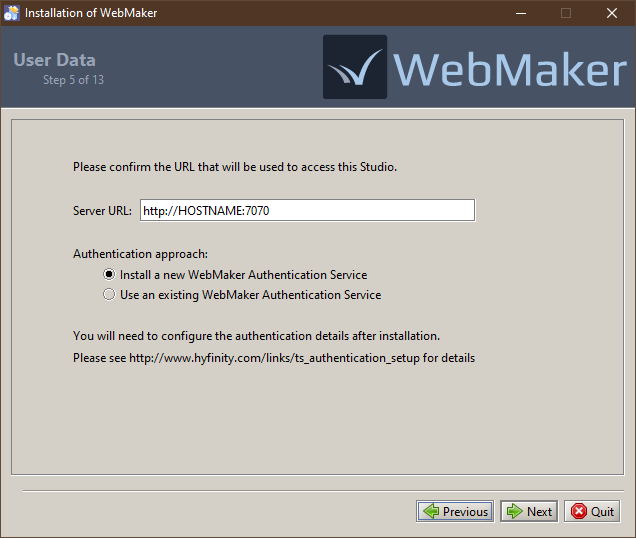
 If you select the Authenticated Multi-User installation option, then the next page will ask for some additional configuration details.
You will need to confirm the URL that you will be using to access this server, as well as configure the authentication approach. If you already have an appropriate authentication service available (eg from a WebMaker Team Server installation) then you can enter the URL for this. Otherwise a new Authentication Service will be installed, which you will need to configure after installation. Please see this page for details on this.
If you select the Authenticated Multi-User installation option, then the next page will ask for some additional configuration details.
You will need to confirm the URL that you will be using to access this server, as well as configure the authentication approach. If you already have an appropriate authentication service available (eg from a WebMaker Team Server installation) then you can enter the URL for this. Otherwise a new Authentication Service will be installed, which you will need to configure after installation. Please see this page for details on this.
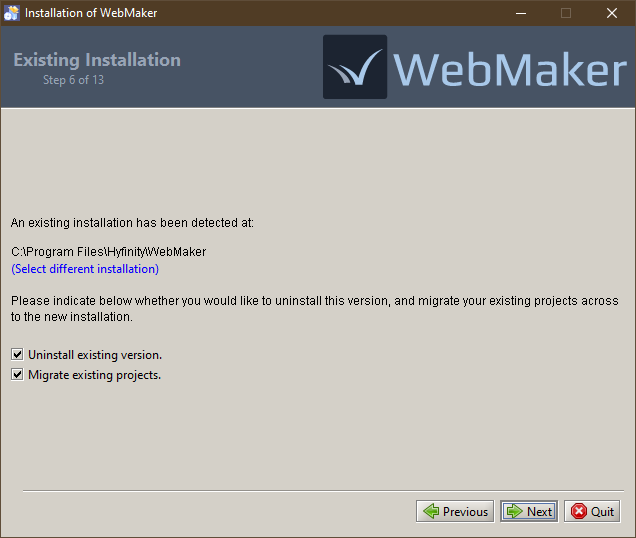
 Any existing WebMaker installations will be detected and shown in the next step, providing the option to uninstall the existing version and migrate existing projects to the new installation. For a standard upgrade scenario you should keep both of these options ticked.
For advanced cases, where you have multiple WebMaker installations, you can use the Select different installation link to select which of your existing installations should be uninstalled, together with your project migration preferences.
Important: If you choose to uninstall an existing version, please ensure you choose the migrate option or first back up your projects. The uninstall process will permanently remove the studio and all projects.
Any existing WebMaker installations will be detected and shown in the next step, providing the option to uninstall the existing version and migrate existing projects to the new installation. For a standard upgrade scenario you should keep both of these options ticked.
For advanced cases, where you have multiple WebMaker installations, you can use the Select different installation link to select which of your existing installations should be uninstalled, together with your project migration preferences.
Important: If you choose to uninstall an existing version, please ensure you choose the migrate option or first back up your projects. The uninstall process will permanently remove the studio and all projects.
 If you chose to migrate existing projects then this will be performed in the next step, followed by the uninstall process for the current version of the studio, if you chose the uninstall option. You will receive on-screen progress information as these tasks are performed. Please be patient during this part of the installation process because it can take some time, depending on the number of projects that require migration. Once the process completes, you will see the temporary location used for storing the exported projects. You can copy this location and use a file explorer to find the files if needed, but they will be automatically imported into the new installation. Note: These files will remain in the temporary location until the WebMaker installer is executed again in future.
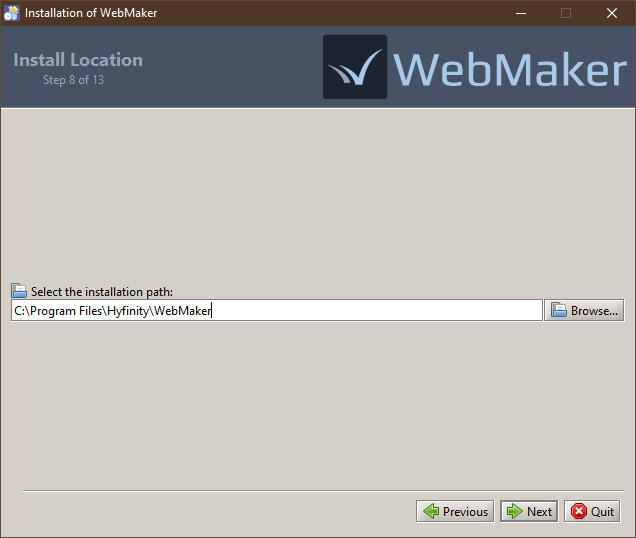
The next step confirms the installation directory for the new installation.
If you chose to migrate existing projects then this will be performed in the next step, followed by the uninstall process for the current version of the studio, if you chose the uninstall option. You will receive on-screen progress information as these tasks are performed. Please be patient during this part of the installation process because it can take some time, depending on the number of projects that require migration. Once the process completes, you will see the temporary location used for storing the exported projects. You can copy this location and use a file explorer to find the files if needed, but they will be automatically imported into the new installation. Note: These files will remain in the temporary location until the WebMaker installer is executed again in future.
The next step confirms the installation directory for the new installation.
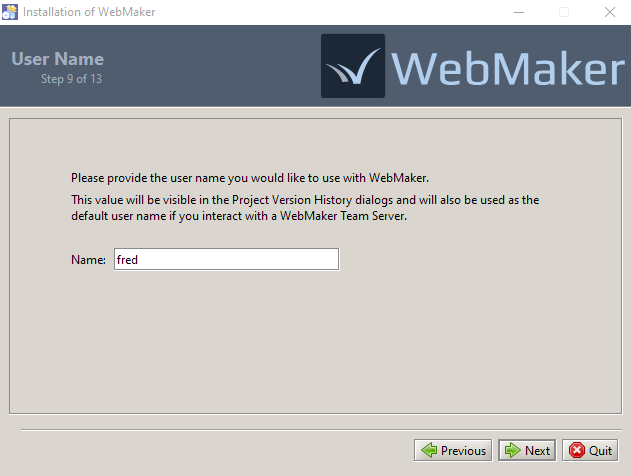
 For a Single-User installation, the next step provides the option to enter a username for WebMaker. The entered name will be shown in the Project Version History dialogues and will also be used as the default user name if you interact with a WebMaker Team Server. This will default to the name of your current OS user account where possible.
Note: If you are migrating the projects from an existing installation where this value has already been set, then you will not be asked to provide it here. In this scenario, the user name from the existing installation will be used for the new installation.
For a Single-User installation, the next step provides the option to enter a username for WebMaker. The entered name will be shown in the Project Version History dialogues and will also be used as the default user name if you interact with a WebMaker Team Server. This will default to the name of your current OS user account where possible.
Note: If you are migrating the projects from an existing installation where this value has already been set, then you will not be asked to provide it here. In this scenario, the user name from the existing installation will be used for the new installation.
 At this stage the installation process will start and you should see the progress information on screen. Please be patient as the installation can take some time and may appear to pause for a while at the end of the installation, while various configurations are prepared.
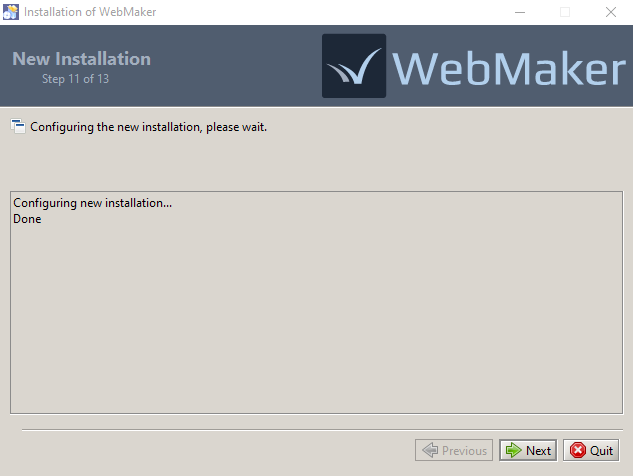
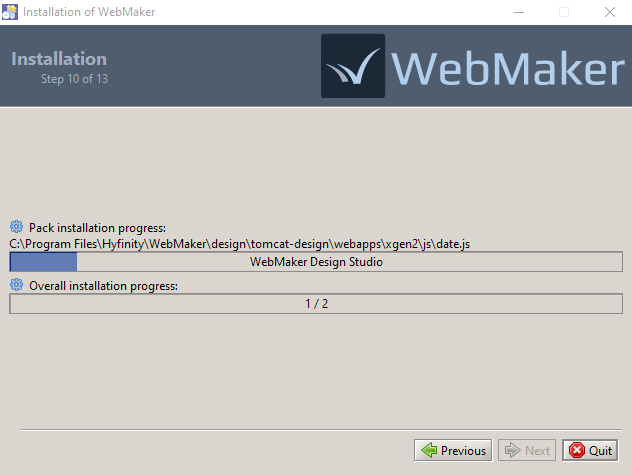 The installation will now be configured. If you chose to migrate projects from your existing installation, these will now be imported into the new installation.
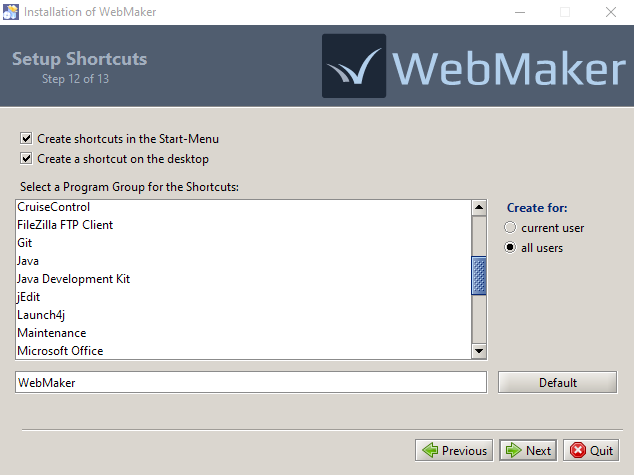
 Once the installation has completed, you may get the option, depending on your OS, to create WebMaker shortcuts on your start menu and the desktop.
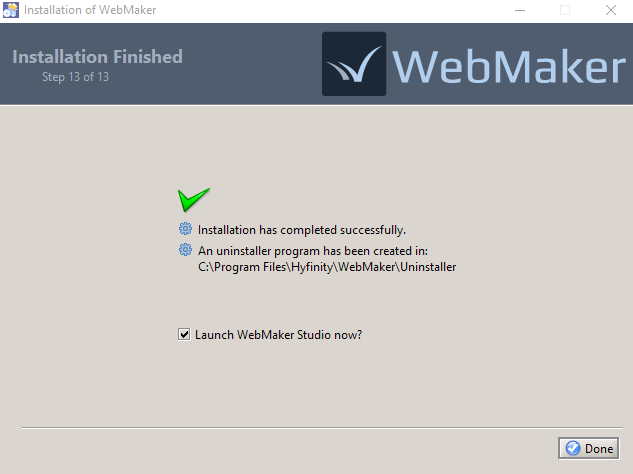
 The final screen may provide the option to launch WebMaker. You should also be able to start WebMaker from your OS's application start menu or desktop shortcut in future.
 The installation process for WebMaker Design Studio is now complete. Additional information for more advanced installation scenarios is available in the WebMaker Forum.